How to wax your skis at home: a step by step guide
- 12 Feb, 2026
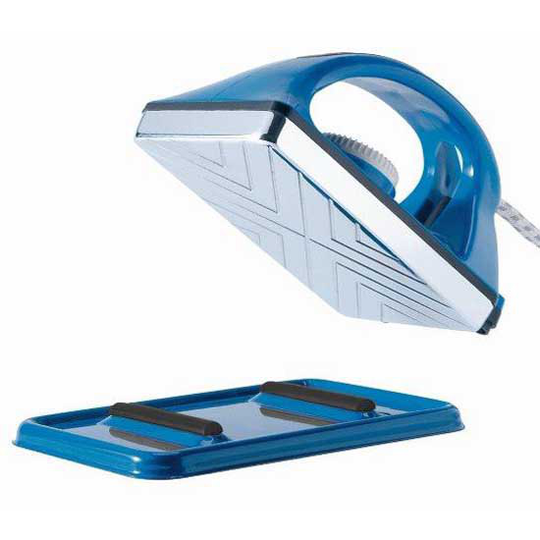
Freshly waxed skis glide more smoothly, turn more easily and are better protected against dry, scratched bases. Many skiers leave waxing to a shop once a season, but it is a simple job to do at home once you have the right tools. It takes less than an hour, it is satisfying, and it means you can keep your skis or snowboard in good shape between trips. Here is how to do it.
What you need
You do not need a full workshop. A basic home waxing kit includes:
- A waxing iron: a dedicated ski waxing iron with adjustable temperature, such as the Holmenkol Smartwaxer. A household clothes iron is not a good substitute, as its temperature is harder to control.
- Wax: choose a wax that matches the snow temperature you expect, or an all temperature wax if you are unsure.
- A plastic scraper: for removing excess wax.
- A brush: nylon or a combination brush works well for most recreational skiers.
- Something to hold the skis: ski vices are ideal, but two sturdy supports on a table will do.
- Rubber bands: to hold the ski brakes up out of the way.
Our ski and snowboard waxes category includes waxes for different temperatures along with irons, scrapers and other tools.
Step by step: hot waxing
- Prepare the base. Make sure the skis are at room temperature and completely dry. Wipe off dirt and old residue with a clean cloth. Fix the brakes up with rubber bands.
- Set the iron. Heat the iron to the temperature recommended on the wax packaging. If the wax smokes, the iron is too hot. Turn it down straight away.
- Drip the wax. Hold the wax against the iron so it melts and drips onto the base in a line down each side of the ski, from tip to tail.
- Iron it in. Move the iron slowly and steadily along the base in long strokes, without stopping in one place. You are aiming for an even, melted layer across the whole base. Keep the iron moving to avoid overheating the base.
- Let it cool. Leave the skis to cool for at least 30 minutes, or longer if you have time. This lets the wax settle into the base.
- Scrape. Hold the plastic scraper at a slight angle and pull it from tip to tail in long strokes until no more wax comes off easily. Use the corner of the scraper to clear the edges and the groove down the middle of the base.
- Brush. Brush from tip to tail with firm, even strokes. This removes the last surface wax and opens up the structure of the base, which helps the skis glide.
Tips and common mistakes
The most common mistake is using an iron that is too hot or holding it still, which can damage the base. Another is leaving too much wax on the ski. Excess wax actually slows you down, so scrape thoroughly. Work in a well ventilated room, protect the floor with an old sheet or newspaper, and let the iron cool down before you put it away.
If your bases have deep scratches or core shots, or your edges need sharpening, it is worth taking the skis to a service shop. Waxing at home is about regular maintenance, not repairs.
How often should you wax?
There is no fixed rule. It depends on how often you ski and on the snow conditions. A good sign that your skis need wax is a dry, whitish look on the base, especially along the edges. Many recreational skiers wax before a trip and again midway through a longer holiday. Before storing your skis for the summer, apply a thick layer of wax and leave it unscraped. It protects the base until next season, and you simply scrape and brush it before your first day back on the snow.